Best car windshield sealant kit shopping gets confusing fast because “sealant” can mean three different jobs: stopping a leak at the edge, bonding a windshield in place, or filling a small chip so it doesn’t spread. If you buy the wrong type, the leak comes back, the repair looks messy, or you end up with a safety issue you didn’t bargain for.
This guide is built for real-life situations, rainwater dripping onto your dash, a faint whistle at highway speed, a chip you keep poking at with your thumbnail. I’ll help you pick the right kit category, what to look for on the label, and how to get results that hold up longer than a weekend.
One quick note before we get practical, windshields are structural on many modern vehicles, so “sealing” is not always a cosmetic job. According to NHTSA, the windshield can contribute to roof strength and supports proper airbag performance in many designs, so if you suspect the glass is loose or the bond is failing, it’s worth treating it as a safety item, not a DIY experiment.
What “windshield sealant kit” really means (and why it matters)
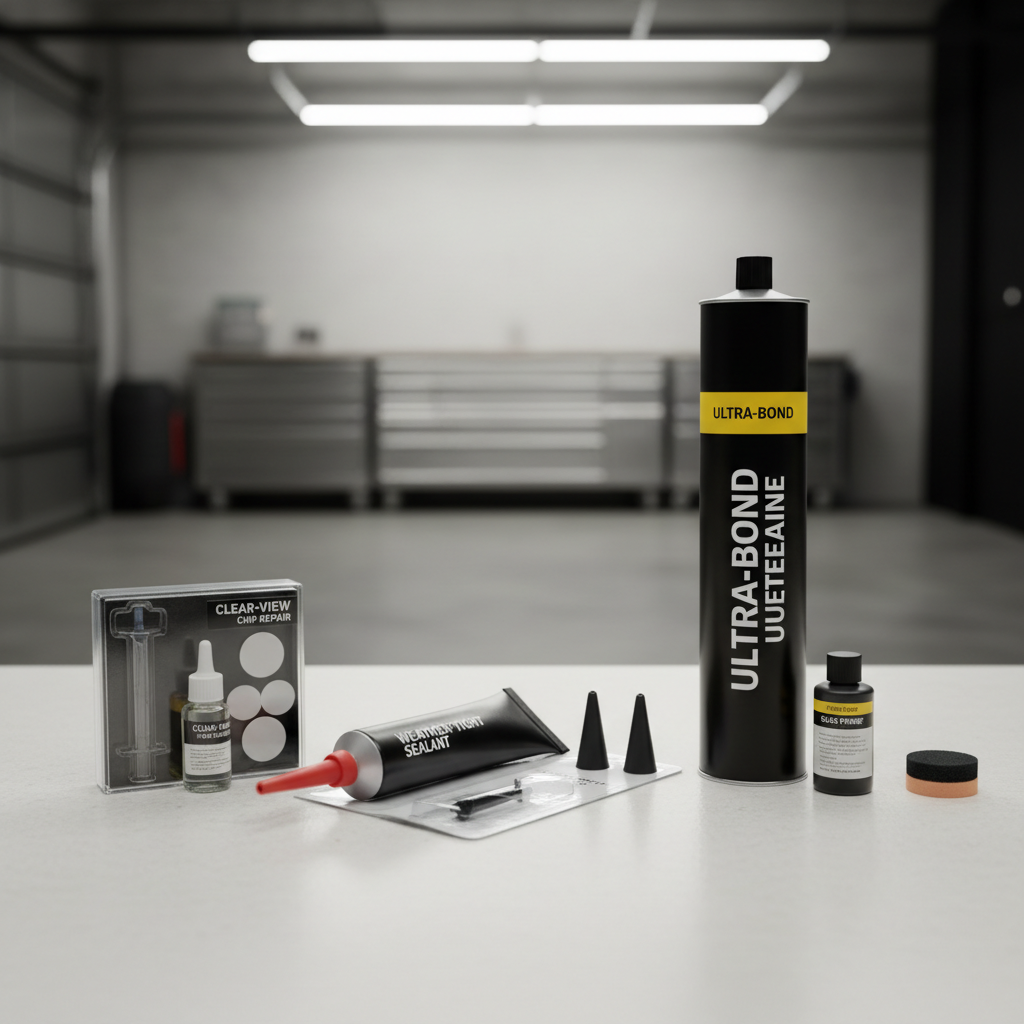
Most kits on Amazon or at auto parts stores fall into one of these buckets, and the bucket matters more than brand names.
- Glass repair resin kits (chips and small cracks): Clear resin + injector or syringe. Intended for rock chips, bullseyes, small star breaks, and very short cracks.
- Leak sealing kits (perimeter gaps and trim): Silicone, butyl, or hybrid sealant in a tube, sometimes with primer and applicators. Intended for water intrusion around moldings and seams.
- Urethane windshield adhesive kits (rebonding): Automotive urethane, often with primer and nozzle tips. Intended to bond the windshield to the frame.
If your goal is “stop water,” you might assume any sealant works, but perimeter leaks can be caused by clogged cowl drains, a shifted molding, rust under the pinch weld, or a failed urethane bond. The right kit helps, the wrong one just hides the symptom.
Quick buyer’s checklist: how to choose the right kit
If you only read one section, make it this. Most people don’t need the “strongest” product, they need the one that matches the failure.
- Problem type: chip/crack vs edge leak vs loose glass. Match kit category to the job.
- Location: top edge leaks often relate to trim/molding; bottom edge leaks may trace to cowl drainage; corner leaks can hint at bond failure.
- Appearance goals: resin can look nearly invisible on small chips, but not always on long cracks.
- Weather window: many sealants need dry surfaces and moderate temps. Plan around rain and overnight dew.
- Tools included: injector quality, razor blades, curing film, primer wipes, nozzle tips. Missing basics slows you down.
- Safety relevance: if glass shifts, creaks, or you see rusted pinch weld, consider professional rebonding.
Key point: a “best car windshield sealant kit” for a rock chip is usually a resin injector kit, while a “best” kit for a leak might be a seam sealer or a urethane system depending on what failed.
Top kit categories for 2026: what to buy for each scenario
Rather than pretending one box wins for everyone, here’s how I’d shortlist by scenario. Use this as your shopping filter, then compare brands on availability and included accessories.
1) For rock chips and small cracks: resin injector repair kits
Pick this when you have a bullseye, star break, or a chip smaller than a dime, and the glass around it still feels solid.
- Look for bridge-style injector (more consistent pressure than simple syringes).
- Prefer kits with curing film strips and a razor blade for finishing.
- UV curing can be sunlight-based or lamp-based, either can work if you follow timing and keep the repair clean.
2) For water leaks around trim: perimeter leak sealant kits
Pick this when you see water trails, damp A-pillars, or drips after a car wash, and the glass itself doesn’t move.
- Choose automotive-grade silicone/hybrid sealant that stays flexible and resists UV.
- Consider butyl-style sealants for certain trim gaps, but keep in mind they can attract dirt and look messy if overapplied.
- A kit with primer helps on painted metal and older trim, but surface prep still matters most.
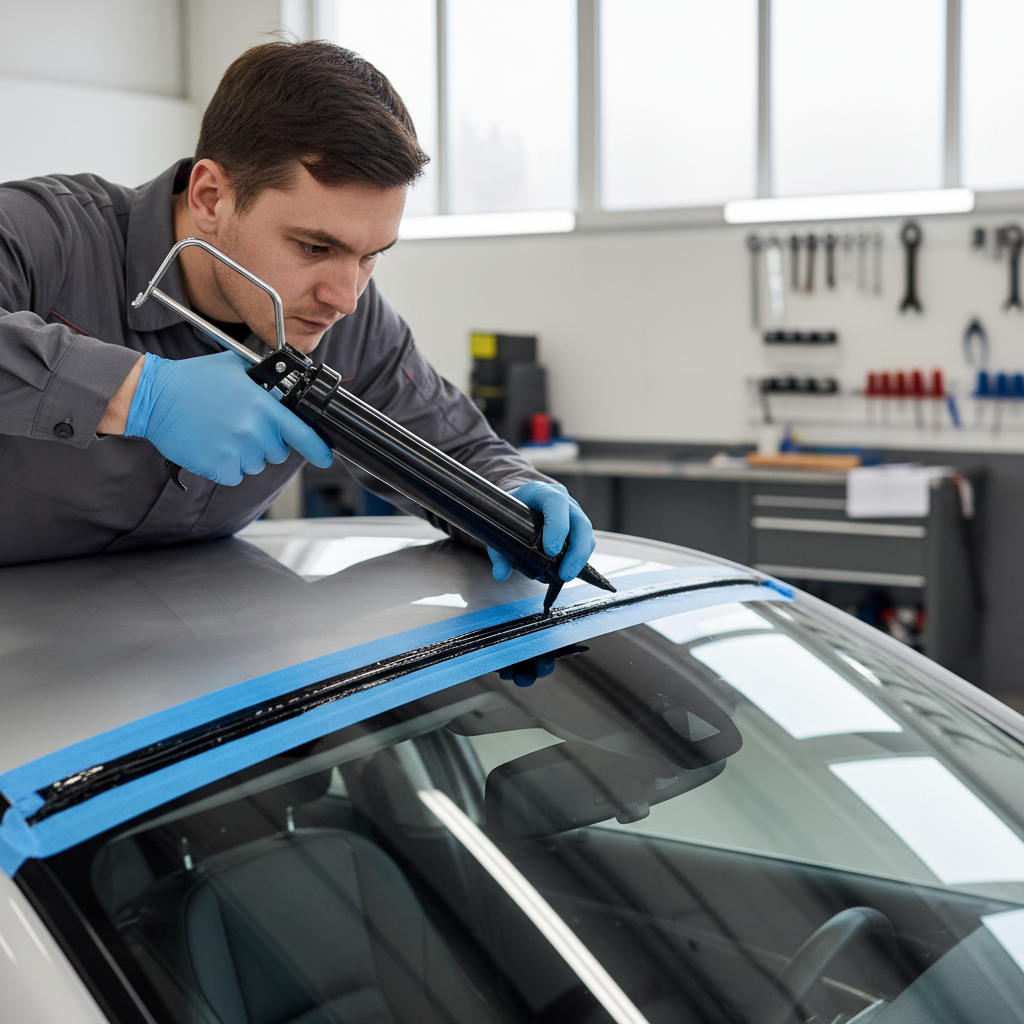
3) For a windshield that’s not bonded properly: urethane adhesive kits
Pick this only when you’re confident the issue is bond-related and you can follow cure-time and prep requirements. Urethane is not the same as “sealant caulk.” It’s structural adhesive.
- Look for OEM-grade urethane labeling and a compatible glass/paint primer.
- Check safe drive-away time guidance on the product, it varies by temperature and humidity.
- If airbags or ADAS sensors are involved, a shop may be the safer call.
Comparison table: match the kit to your problem
This table is the fastest way to avoid buying the wrong “best car windshield sealant kit” for your particular symptom.
| Situation | Best kit type | What it fixes well | Common mismatch to avoid |
|---|---|---|---|
| Rock chip (bullseye/star) | Resin injector kit | Stops spreading, improves clarity | Using silicone on glass damage |
| Short crack (often < 6 inches) | Resin kit (crack-capable) | May slow or stop crack growth | Expecting “like new” appearance |
| Water drip from top/side molding | Perimeter leak sealant kit | Seals trim gaps and minor seepage | Sealing over dirty, wet surfaces |
| Wind noise + visible gap, glass shifts | Urethane adhesive system | Rebonds windshield (structural) | Using non-automotive caulk |
| Leaks after windshield replacement | Diagnosis first, often urethane | Corrects bond or install issues | Adding exterior bead as “fix” |
DIY self-check: identify what’s actually failing
Before you order anything, spend five minutes confirming the source. Many “windshield leaks” are really water routing problems.
- Check the cowl area (plastic panel at the base of the windshield): leaves and debris can redirect water into the cabin. Clear drains first.
- Look for rust bubbles under the molding line: rust can lift trim and break the seal path.
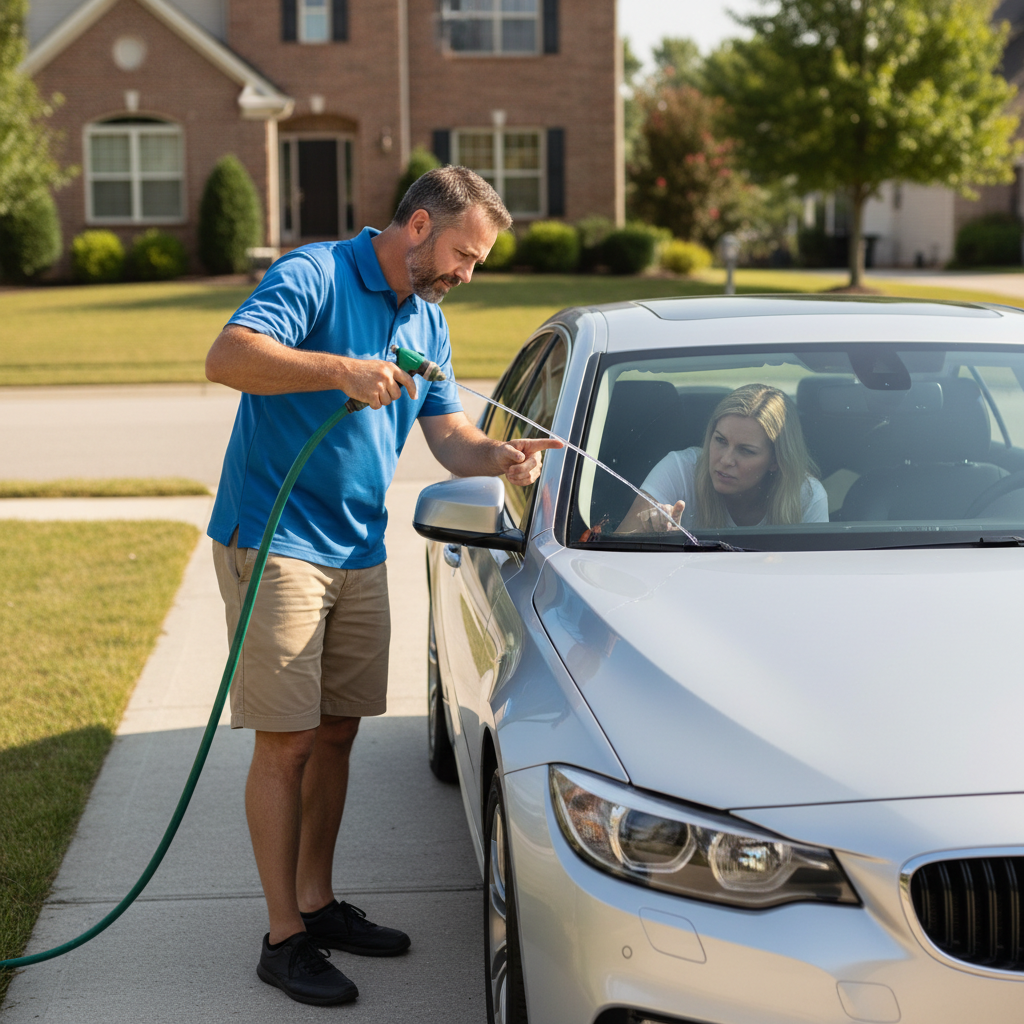
- Do a controlled water test: have someone sit inside while you run low-pressure water over one section at a time. Avoid pressure washers, they can force water where it normally wouldn’t go.
- Listen for wind noise zones: a whistle near one corner may hint at a gap, not a chip.
- Inspect the chip: if there’s dirt packed inside, resin repairs tend to look worse and bond less consistently.
If your test suggests the windshield bond is compromised, that’s where DIY gets risky. According to Auto Glass Safety Council (AGSC), proper adhesive selection and installation practices are central to occupant safety, so if you’re unsure, it may be smarter to stop at diagnosis and bring that info to a glass shop.
How to apply a windshield sealant kit so it actually holds
Most failures come from prep, not the product. Even the best car windshield sealant kit can’t bond to wax, road film, or damp trim.
For resin chip repair kits
- Work clean: shade helps, keep dust and pollen off the glass.
- Remove loose glass carefully: use the kit’s pin tool lightly, don’t “dig” a crater.
- Center the injector: pressure and vacuum cycles matter more than extra resin.
- Cure fully: follow the kit’s UV timing. Under-curing often leaves a soft spot that attracts dirt.
- Finish flush: curing film plus a fresh razor makes the repair smoother and clearer.
For perimeter leak sealants
- Dry the area: if you can’t keep it dry for a few hours, postpone the job.
- Use painter’s tape to control the bead, especially along visible edges.
- Apply a thin, continuous bead: most people use too much, which traps dirt and peels sooner.
- Tool the bead (smooth it) with a gloved finger or plastic tool, then remove tape before skin-over.
For urethane adhesive kits
This is where you follow manufacturer directions like a checklist, primer flash times, bead height, and cure times matter. If you don’t have a way to keep the glass positioned correctly, stop and call a pro, because a partial bond can be worse than a visible leak.
Mistakes that make leaks come back (even with good products)
- Sealing over old silicone: new sealant often won’t adhere well. Removal takes time but saves you from repeat work.
- Ignoring trim and clips: a loose molding can keep flexing and break the seal line.
- Using household caulk: it may not handle automotive vibration, UV, and temperature swings.
- Expecting resin to fix long cracks: many long cracks keep creeping, especially with temperature changes.
- Skipping cure time: driving too soon can disturb fresh sealant and create micro-gaps.
When to stop DIY and get professional help
Some cases are not “hard,” they’re just higher stakes. If any of these match, professional inspection usually makes sense.
- The windshield moves when you press near the edge, or you hear creaking
- You see rust at the pinch weld or under the molding line
- Leaks started right after a replacement, especially with ADAS cameras involved
- A crack runs into the driver’s main viewing area, or spreads quickly
- You suspect the leak is coming from the roof seam, sunroof drains, or firewall area
If you bring your own notes from the water test and photos of the suspected entry point, shops can often diagnose faster, and you avoid paying for “guesswork.”
Conclusion: the “best” kit is the one that matches your failure mode
If you’re choosing a best car windshield sealant kit for 2026, decide what you’re fixing before you compare brands: resin kits for chips, perimeter sealants for minor trim leaks, urethane systems for bonding issues. Then focus on prep, dry time, and neat application, those steps usually decide whether you get a one-and-done repair or a leak that returns next month.
If you want a simple next step, run a low-pressure water test, identify chip vs edge leak vs bond concern, then buy the kit category that fits. That’s the fastest path to a repair that looks clean and holds up.
FAQ
- What is the best car windshield sealant kit for a leak at the top of the windshield?
Many top-edge leaks come from molding gaps or old sealant, so a perimeter leak sealant kit is often the right starting point, but only after cleaning and drying the area and confirming the leak path with a controlled water test. - Can I use silicone to seal a cracked windshield?
Silicone can block water briefly, but it won’t restore glass strength or stop a crack from spreading in many cases. For chips and small cracks, a resin repair kit is usually the correct tool. - Do resin windshield repair kits really work?
They can work well on small, clean damage when applied carefully, especially for preventing spread. Appearance varies, and dirty or old chips tend to look more noticeable after repair. - How do I know if my windshield needs urethane rebonding?
If you notice glass movement, persistent wind noise from one corner, or leaks after a recent replacement, the bond may be compromised. Because this can be safety-related, it’s reasonable to have a glass professional confirm. - How long should sealant cure before driving?
It depends on product chemistry and conditions. Perimeter sealants may skin over quickly but still need hours to cure; urethane adhesives have specific safe drive-away times. Follow the label, and when in doubt, wait longer. - Why does my windshield leak only in heavy rain or at high speed?
Water can enter only when flow volume or pressure increases, often through small gaps in trim or channels that overflow due to clogged drains. Cleaning the cowl area and doing a section-by-section water test usually reveals the trigger.
If you’re trying to pick a best car windshield sealant kit but you’re not sure whether you’re dealing with a chip, a trim leak, or a bonding issue, it may help to start with a quick diagnosis checklist and photos before buying, it saves money and keeps the fix from turning into a repeat project.