How to clean car headlights with toothpaste is one of those DIY fixes that can help when your lenses look lightly cloudy and you want a quick improvement before a night drive or inspection.
That said, toothpaste is not magic, it works mostly by gentle abrasion, so results depend on why the headlight looks dull in the first place. If the lens has deep oxidation, yellowing, or cracking, toothpaste can make it look a bit better for a short time, but it often won’t last.
I’ll walk you through when this trick makes sense, how to do it without scuffing your paint, and how to tell when you should switch to a proper restoration kit or a pro detailer.
Why headlights get cloudy (and what toothpaste can actually change)
Most modern headlights use polycarbonate plastic, it’s tough, but the surface still takes a beating from UV, road grit, and chemicals. Over time, the clear top layer degrades and scatters light, so your beam looks dim and the lens looks hazy.
- Surface oxidation: a chalky film on top, often the best case for a quick DIY polish.
- Embedded grime: bug residue, tar, and traffic film, cleaning helps but polishing might not be required.
- Degraded clear coat: the factory UV layer has failed, the lens may re-haze quickly after polishing.
- Cracking or pitting: tiny fractures or stone chips, toothpaste won’t “fill” these, you’re seeing physical damage.
- Moisture inside the housing: condensation from a seal leak, polishing the outside won’t solve it.
Toothpaste mainly helps by lightly polishing the outer surface, in other words, it can reduce the look of mild oxidation and improve clarity a bit. If the issue sits deeper than the surface, expectations should stay modest.
Quick self-check: is toothpaste worth trying on your headlights?
Before you grab the tube, take 30 seconds and do a simple check, it saves time and avoids frustration.
Good candidates for toothpaste
- The lens looks slightly dull or lightly yellowed, not fully opaque.
- When you wet the lens, it briefly looks clearer, that often hints the haze is on the surface.
- You’re okay with a temporary improvement and plan to add protection afterward.
Usually not worth it
- The lens has heavy yellowing, patchy peeling, or spiderweb cracks.
- Light output is still weak after cleaning, or you see fog inside the lens.
- You already tried polishing and it re-clouded within days, that often means the UV layer is gone and needs proper sealing.
If you land in the “good candidate” group, how to clean car headlights with toothpaste is a reasonable first attempt, just treat it like a quick polish, not a restoration.
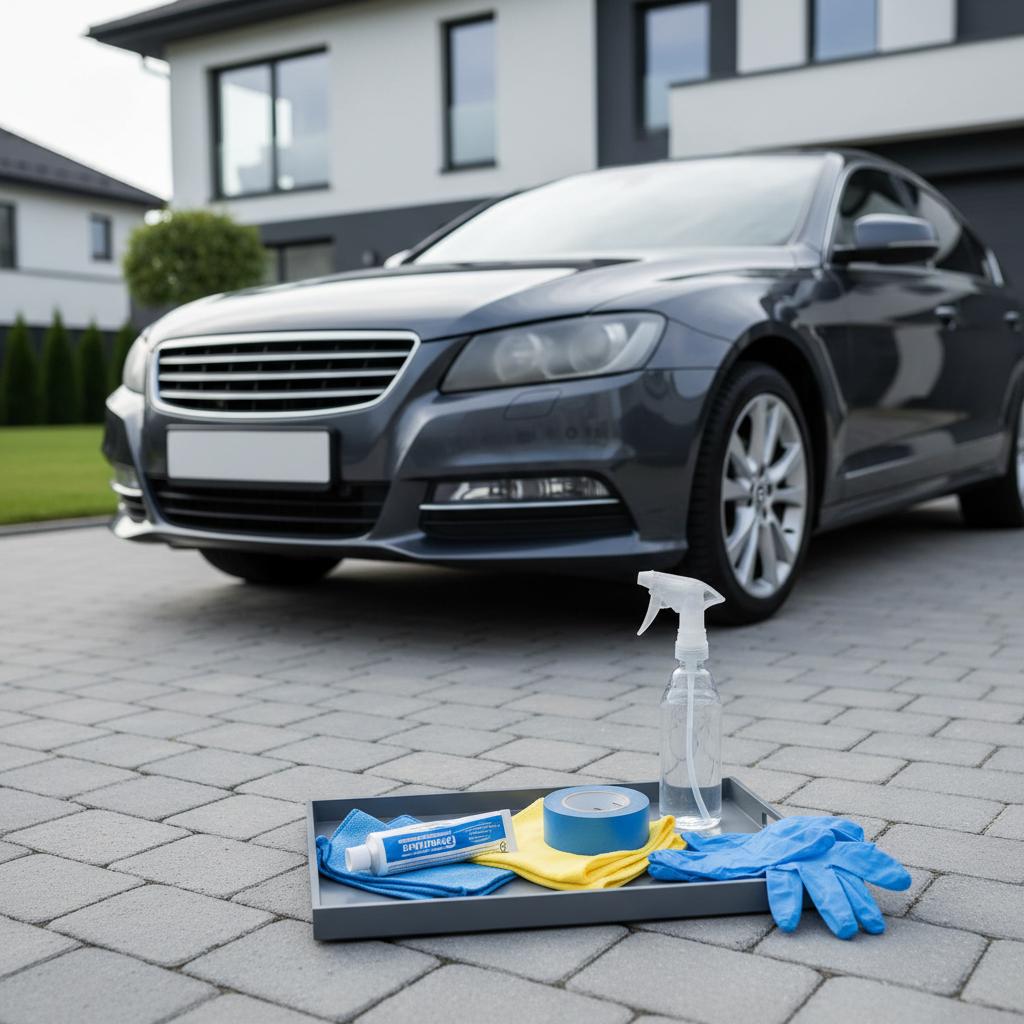
What you’ll need (and what to avoid)
Keep it simple, the goal is controlled polishing without scratching plastic or scuffing paint.
- Plain white toothpaste (non-gel), mild whitening formulas are fine, avoid gritty “charcoal” types.
- Microfiber cloths (at least 2), one for polishing, one for wipe-off.
- Painter’s tape to protect surrounding trim and paint.
- Water in a spray bottle, plus mild car soap for pre-clean.
- Optional: nitrile gloves, especially if you’ll apply a sealant later.
Avoid heavy abrasives, scouring pads, and aggressive compounds unless you know what you’re doing, plastic scratches easily and looks worse under headlights at night.
Step-by-step: how to clean car headlights with toothpaste (DIY)
Plan for about 15–30 minutes for both headlights, longer if you’re being careful with prep and protection.
1) Wash the lens and surrounding area
Use car soap and water, then dry. Polishing over grit can put fine scratches into the plastic, that’s the big avoidable mistake.
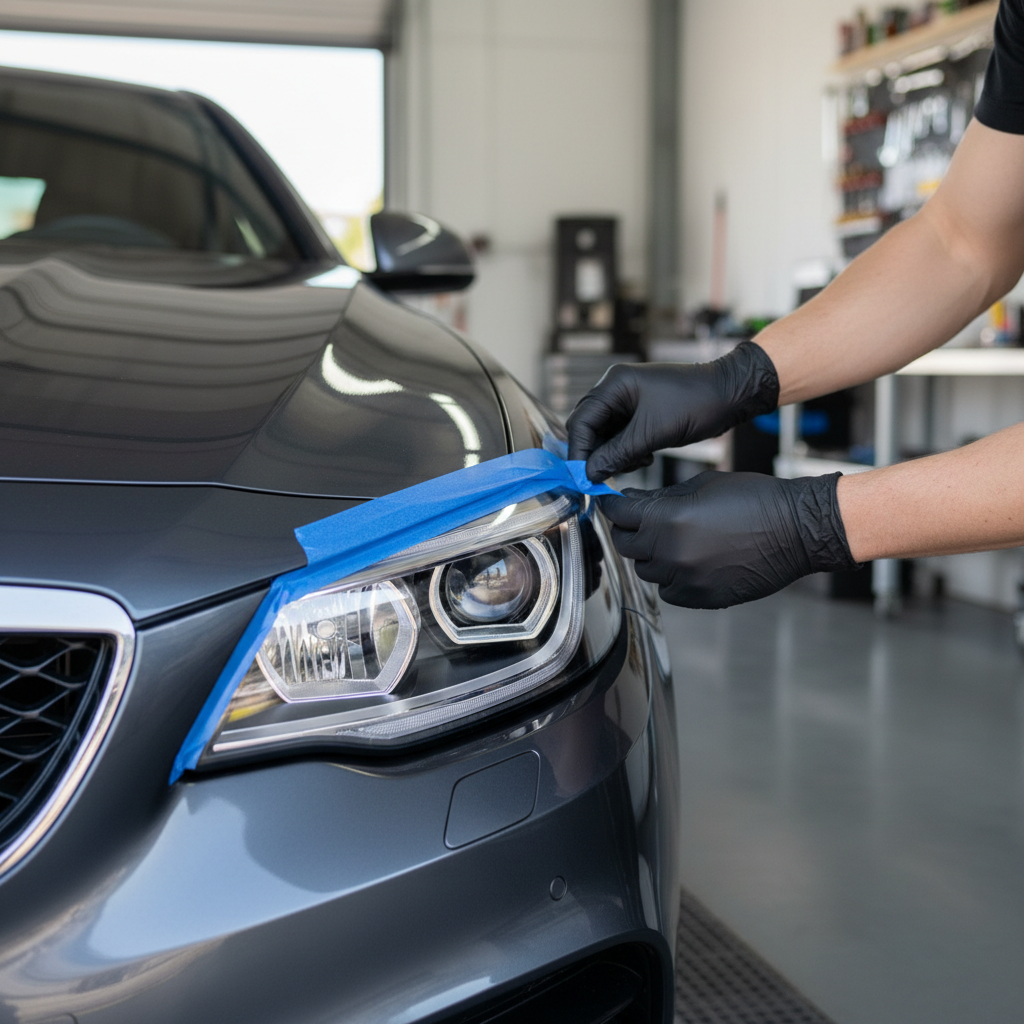
2) Mask the paint and trim
Run painter’s tape around the headlight edges. If you skip this, toothpaste residue can lodge into textured trim, and your cloth can rub the clear coat near the lens.
3) Apply toothpaste to a damp microfiber
A pea-to-nickel sized amount per section is enough. If it feels dry, mist the lens lightly, you want controlled slip, not a paste that drags.
4) Polish with light to medium pressure
Use small circular motions, then switch to straight passes, keep your pressure even. Spend extra time on the cloudiest zones, but don’t grind one corner hard, that’s how uneven haze happens.
5) Keep it slightly wet, then wipe clean
Mist with water as needed, then wipe off thoroughly with a clean microfiber. If residue remains, it can dry chalky and make the lens look worse than before.
6) Inspect and repeat once if needed
One more round is usually the max for this method. If you need three or four passes, you’re probably in “restoration kit” territory.
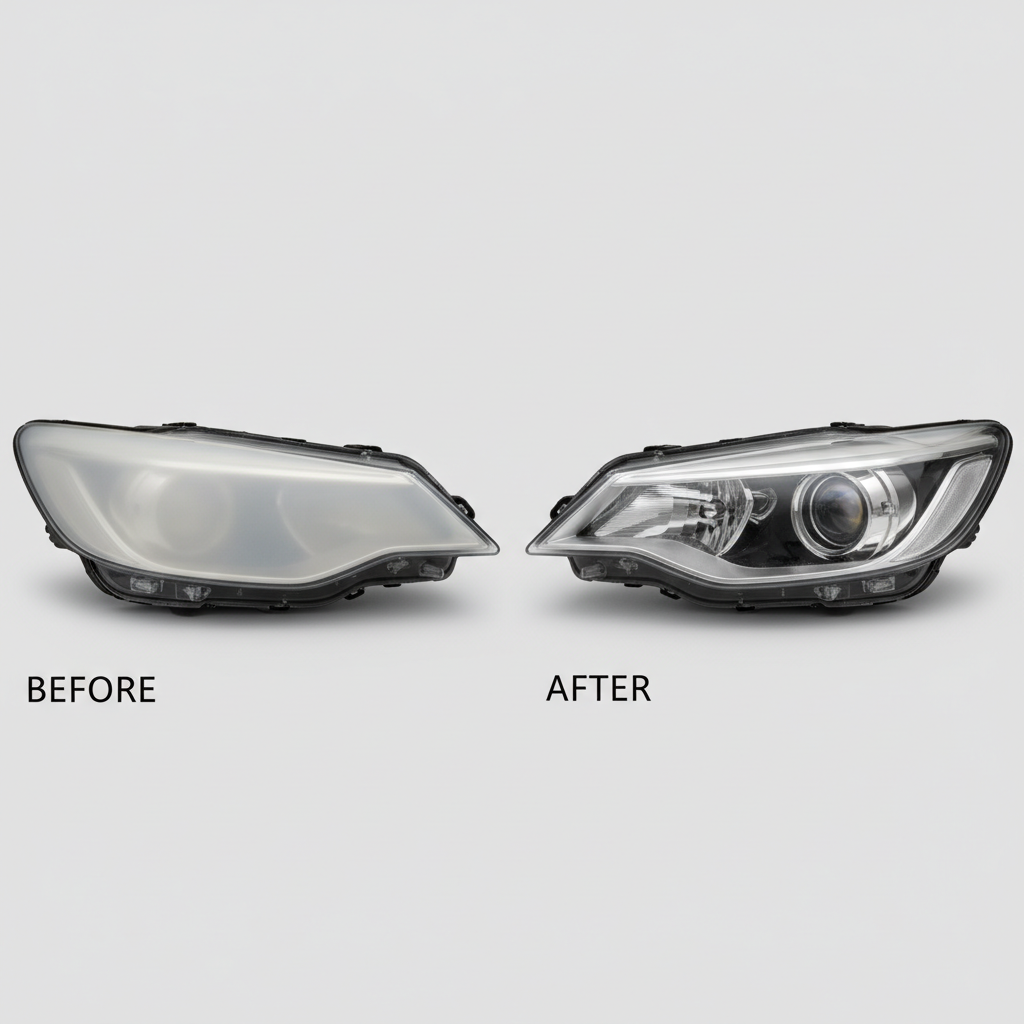
7) Dry and evaluate at different angles
Look in shade and sun. If the lens is clearer but still yellow, that’s often deeper oxidation, toothpaste has done what it can.
How long results last (and why protection matters)
This is the part many DIY guides skip, the “clean” look often fades because polishing removes some oxidation but also leaves the surface unprotected.
According to the National Highway Traffic Safety Administration (NHTSA), headlamps are part of the lighting system tied to visibility and safe driving, so if your lights still look dim after DIY cleaning, it’s worth taking the problem seriously rather than assuming it’s cosmetic.
If you want the improvement to stick, add protection right after the lens is clean and dry.
- Quick option: a dedicated headlight UV sealant wipe or spray.
- Better option: a headlight restoration kit that includes a UV protectant step.
- Detailer option: professional polish plus durable coating, often best for frequent highway drivers.
Toothpaste vs restoration kit vs professional: a realistic comparison
If you’re deciding whether to keep DIYing or upgrade, this table is the clearest way to think about it.
| Method | Best for | Typical durability | Tradeoffs |
|---|---|---|---|
| Toothpaste DIY | Light haze, quick improvement | Days to a few weeks (varies) | Limited correction, can re-haze fast without UV protection |
| Restoration kit (sand/polish + UV) | Moderate oxidation, yellowing | Months to longer (varies by kit and prep) | More steps, risk of uneven sanding if rushed |
| Professional restoration | Heavier oxidation, best cosmetic finish | Often longer with quality coating | Costs more, depends on shop process and warranty |
| Headlight replacement | Cracking, internal haze, failed housing seals | Longest | Highest cost, may require aiming/calibration on some vehicles |
Mistakes that make headlights look worse
Most “toothpaste failed” stories come from a handful of issues, not from the idea itself.
- Using gritty toothpaste that scratches plastic, those micro-scratches glare at night.
- Skipping the wash, rubbing road grit into the lens.
- Not sealing afterward, the lens oxidizes again quickly.
- Over-polishing edges, creating uneven clarity near the border.
- Confusing outside haze with inside moisture, you can polish forever and never fix a leaking seal.
If you see improvement but it’s patchy, stop and reassess your surface condition. Patchiness often means uneven oxidation removal, at that point a kit with proper abrasion steps tends to be more predictable.
When to get more help (and safety notes)
Headlights aren’t just appearance, they affect what you can see and what other drivers can see. If your visibility still feels limited after cleaning, it’s smart to treat it as a safety and maintenance issue.
- If lenses are cracked, heavily pitted, or peeling, a pro can confirm whether restoration is viable or replacement makes more sense.
- If you have condensation inside the housing, a technician can check vents, seals, and rear caps, DIY exterior polishing won’t address it.
- If you replace bulbs and still see poor output, ask a shop to check aim and electrical issues, misalignment is common after front-end work.
Use common-sense precautions, work on a cool surface out of direct heat, avoid getting product into eyes, and if you’re unsure about plastic condition or coating choices, a detailer or auto body shop can usually advise quickly.
Key takeaways you can act on today
- Toothpaste can help with light surface haze, it’s basically a mild polish.
- If you want results that last, add UV protection right after cleaning.
- If haze is severe, patchy, or inside the housing, switch approaches to a restoration kit or a professional inspection.
If you’re trying how to clean car headlights with toothpaste tonight, do one headlight first, check the look in different light, then decide whether the second lens deserves the same method or a stronger plan.
FAQ
Does toothpaste really clean headlights or just hide the haze?
It usually improves clarity by polishing away a thin layer of surface oxidation, so it’s not purely “hiding,” but it’s limited. If the oxidation is deeper or the UV layer has failed, it tends to come back quickly without a protectant.
What kind of toothpaste should I use for headlight cleaning?
Plain, non-gel toothpaste is the safer bet. Avoid very gritty formulas like charcoal blends, many people like them for teeth, but on plastic lenses they can leave visible micro-scratches.
How long will toothpaste-cleaned headlights stay clear?
In many cases it’s short-lived, sometimes days to a few weeks, depending on sun exposure and how degraded the lens is. A UV sealant step usually makes the biggest difference in longevity.
Can I use baking soda with toothpaste for faster results?
You can, but it raises the abrasion level and the scratch risk. If you feel you need extra “cut,” that’s often a signal to use a proper headlight restoration kit designed for plastic.
Will toothpaste damage headlight plastic?
It can if the formula is abrasive or if you polish over dirt. Keeping the lens clean, using microfiber, and avoiding harsh pressure reduces the risk, but if your lens is already brittle or cracked, be cautious and consider professional advice.
My headlights are clear after polishing but look yellow again soon, why?
That often points to missing UV protection or a lens surface that has lost its factory coating. Toothpaste may smooth it briefly, but without sealing, oxidation returns fast, especially on cars parked outdoors.
Is a headlight restoration kit better than toothpaste?
For moderate oxidation, yes, kits typically include abrasives that cut more evenly plus a UV protectant. Toothpaste is fine as a low-effort test, but kits are more consistent when haze is obvious.
If you’re cleaning up a vehicle for a sale, a lease return, or just trying to drive more confidently at night, a toothpaste polish can be a quick first pass, and if you’d rather not guess, a basic restoration kit with a UV protectant step is often the more “set it and forget it” route.